How to Ream
MS Hinges
(rev. 03-01-2006)
As mentioned earlier, most hinges will fall on the
larger end of the tolerance range.
Therefore the reaming operation will not be removing a lot of
material. In most cases, it will be more
like a deburring process, removing material only at
the ends of each hinge segment.
The Reamer
The reamer is made up of two parts, both available
from McMaster-Carr: A chucking reamer
with a .0955 diameter and a piece of stainless steel capillary tubing, OD 2.0
mm, ID 1.5 mm. The reamer is ground down
to a diameter of 1.5mm. The capillary
tube is held in place with retaining compound.
I used Loctite 609, also available from
McMaster. You’ll need about .05 inches
ground down to a uniform diameter for a secure bond. If too much gap develops, the Loctite will not cure properly. Shoot for a slight press fit.
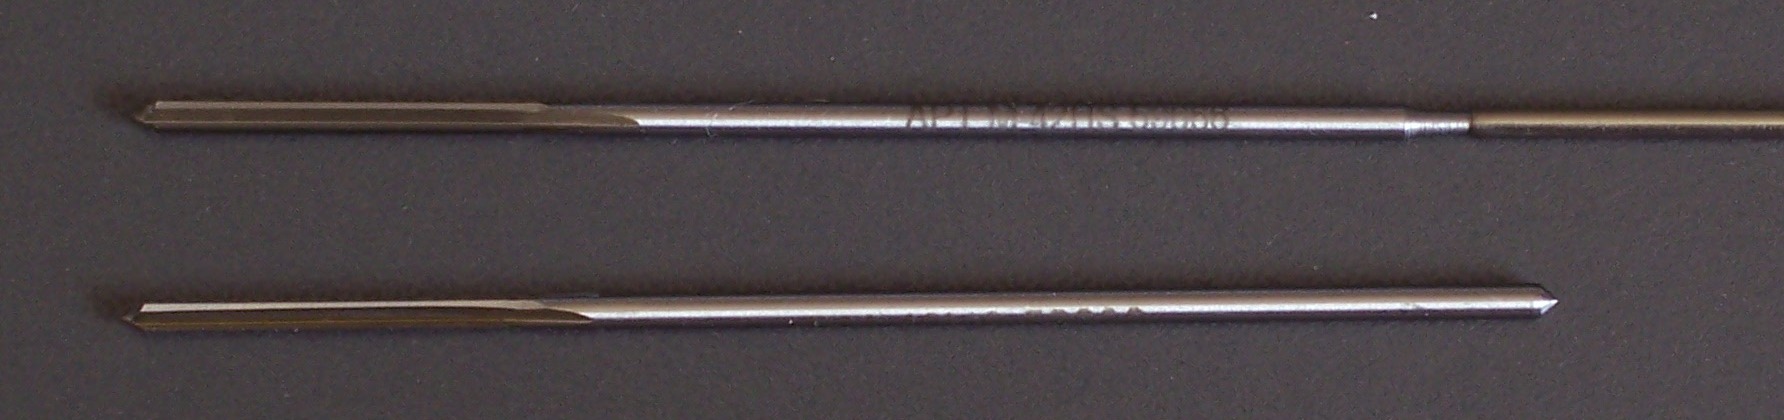
Above: Ground reamer installed on capillary tubing
Below: New reamer
(Click for larger image)
The Reaming Operation
Clamp the hinge piece to be reamed in a vise or to a
table top so that both hands are free.
Keep the reamer lubricated with oil.
Spin the reamer with very little forward pressure. Using a light weight drill works well. You want to be able to feel how much pressure
is being applied so that you can avoid high torque. This could separate the tubing from the
reamer if you happen to have a weak joint.
After reaming, use shop air to clean out any left over
debris.
Reamer making its way through a hinge segment
(Click for larger image)
Inserting the Pin
The hinge pin is 3/32” Stainless Steel welding
rod. I used 308L. If you have the opportunity, check the
diameter with a micrometer. Of all the
batches I have purchased over the years, only one deviated from the nominal
0.09375” by more than just a few ten thousandths of an inch (0.0001).
Here are some tips to avoid difficulty inserting the
hinge pins for the first time.
- Make sure
the end of the pin is rounded and completely deburred. Remember that the clearance may be less
than .002”.
- Make
sure the ID of the hinge is completely clear of any reaming debris and
keep the part well lubricated as you go.